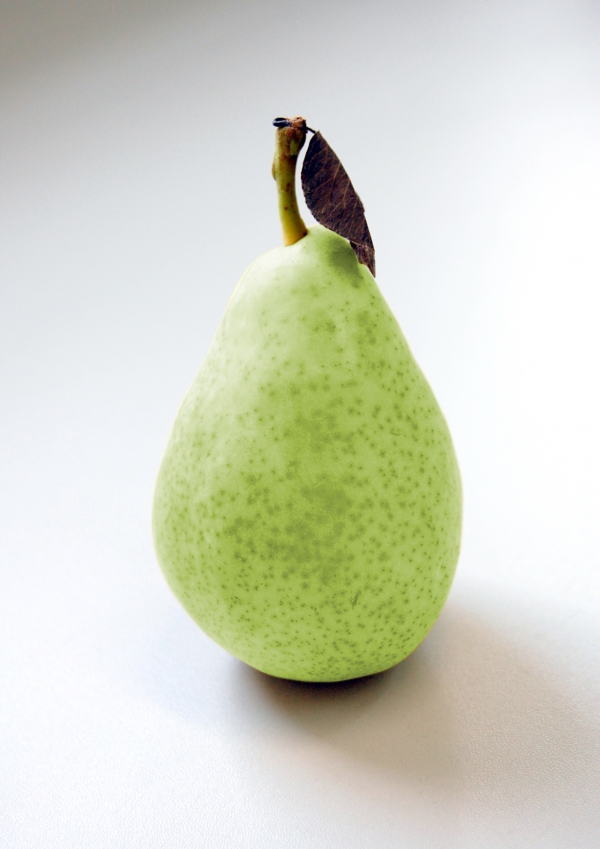
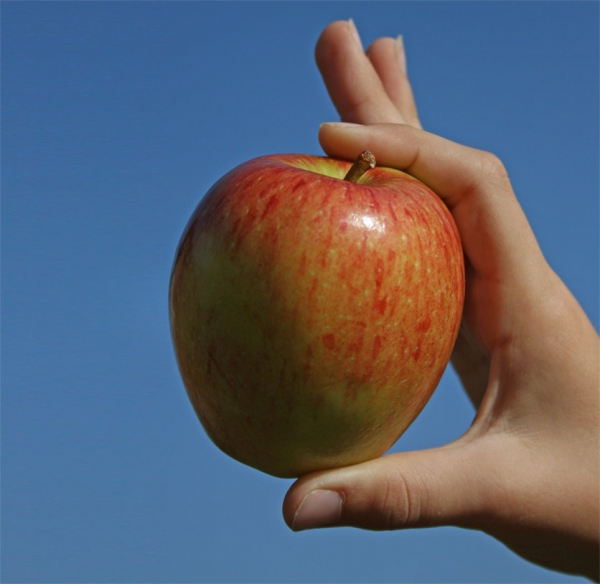
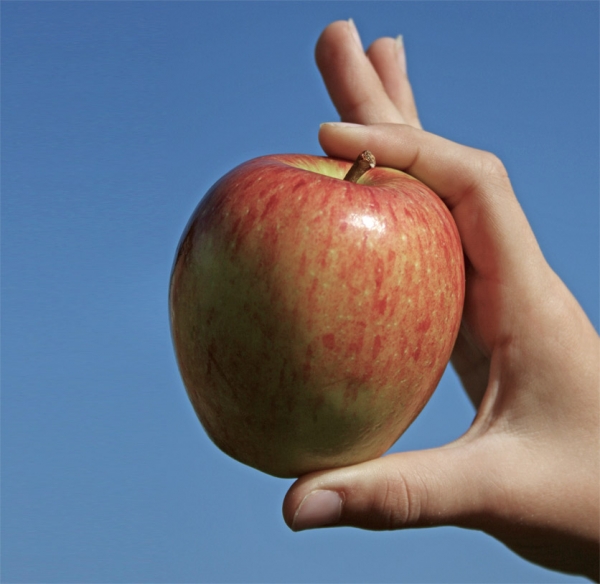
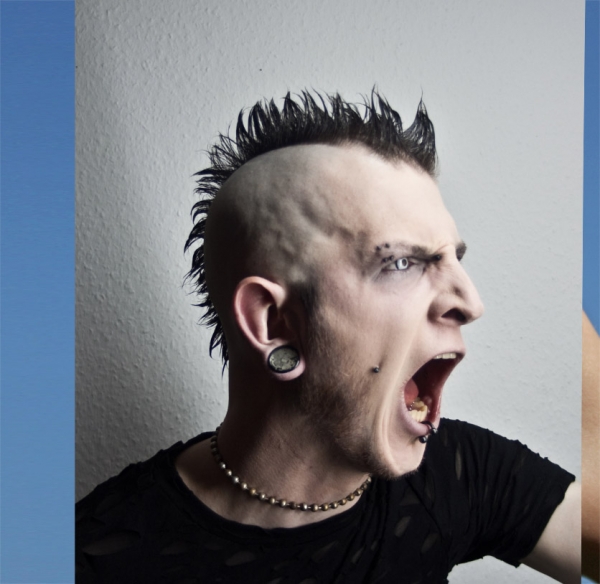
original image
step 2 of 18
Color Adjustments: They adjusted the color to better match the colors of the head. Used S-curve, hue and saturation, and levels adjustments.
Cut out the section of the head that you will be using.
*Image of model from DA... you can find this stock in the links on the main entry page.
Something like this.

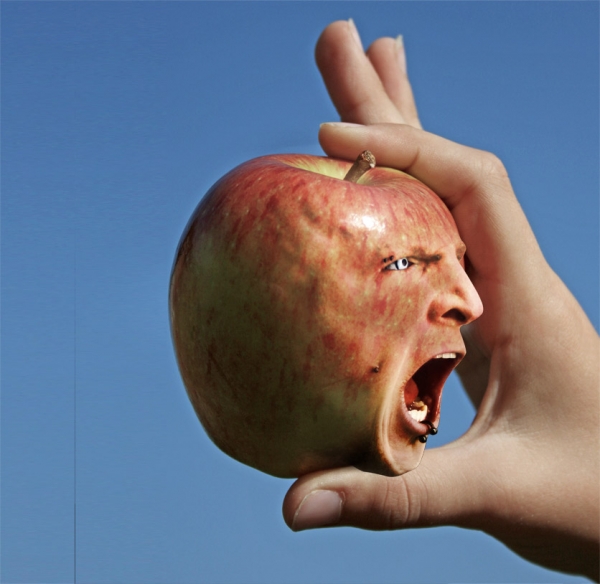
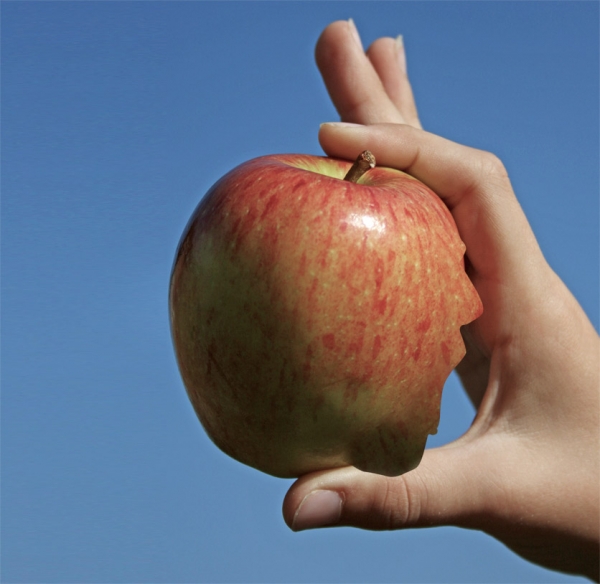
Overlay the head on the fruit. I suggest using the warp or liquify tool to adjust the head to fit the fruit shape better.

Duplicate the fruit layer and cut out the fruit individually.
I set the head layer to 50% opacity and then warped the cut out apple so that it fit the shape of the head.
Once you are happy with the shape of the head, duplicate the head layer before continuing. RT click on the layer and choose Duplicate Layer . . . You will need parts from this head later.
Then unhide the background layer and the layers should look something like this.
Delete access apple, I selected the perimeter of the head
, CTRL + click the layer thumbnail, then inverted the selection,
CTRL + SHIFT + I. and deleted the extra section of the fruit
Delete. It should look like this.

It should look something like this . . .
Duplicate the head layer. Then COMPLETELY DESATURATE the layer by creating a new adjustment layer above the head layer, choose, Hue/Saturation and set to -100.
UPDATE: Make the layer black and white. Use the Black & White adjustment layer then merge it down.
Then change the Layer Style to
Hard Light. Merge the layer style down to the head layer, RT-click on the layer style and choose
Merge Down. Now, change this layers transparency to
about
80%. At least it works for this project.
Repeat for next layer. Duplicate the head layer again. Then COMPLETELY DESATURATE the layer by creating a new adjustment layer above the head layer, choose,
Hue/Saturation and set to
-100. Then change the Layer Style to
Overlay. Merge the layer style down to the head layer, RT-click on the layer style and choose
Merge Down. Now, change this layers transparency to
about
50%. At least it works for this project.
You should have 2 new head layers. One with 80% transparency set to Hard Light. AND one with 50% transparency set to Overlay.

step 2 of 4
I layed the face layer on top of the pear.
I made a duplicate and made that layer black and white.
I changed the layer style to Linear Burn.
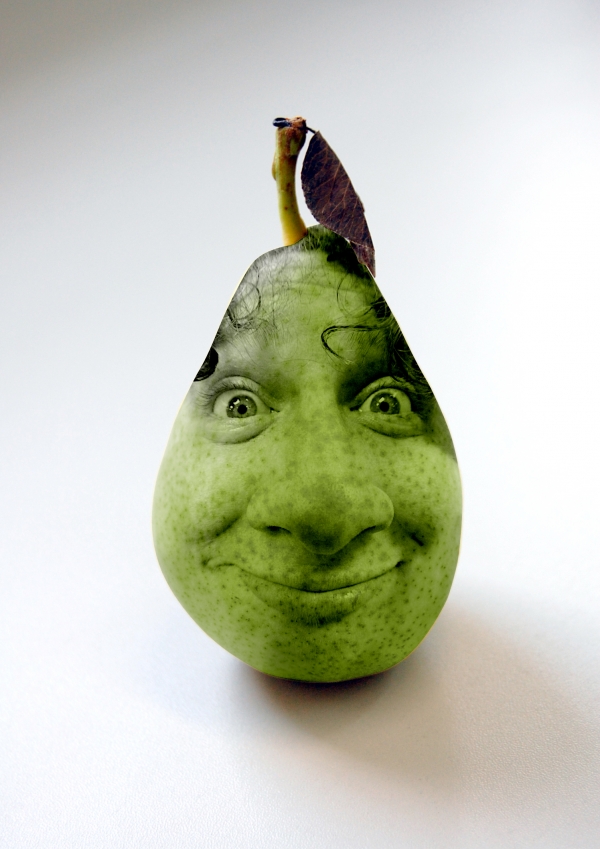
step 3 of 4
I placed the original face layer (the one still in colour) on top of the black and white one. And i masked out the eyes and lips. I changed the Hue and sat of both so that the eyes stand out more and the lips blend in more with the pear.
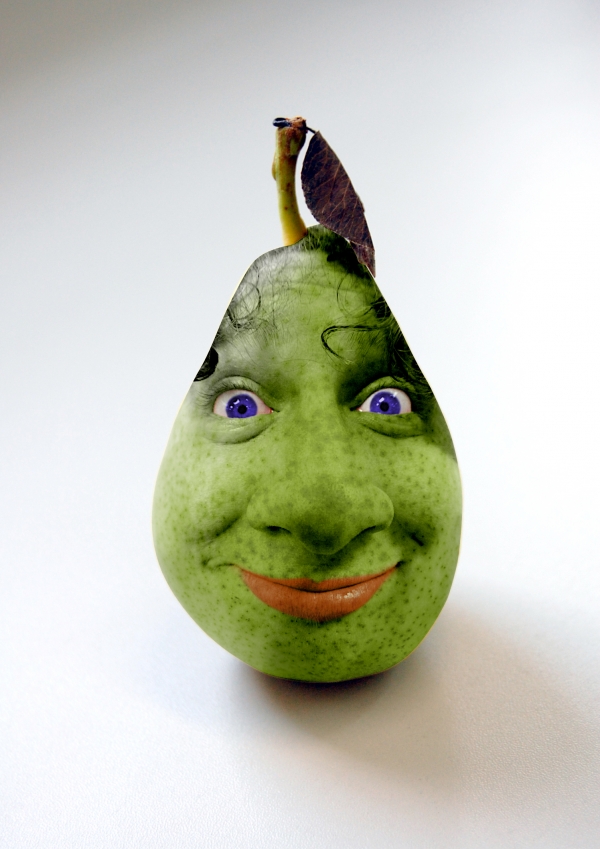
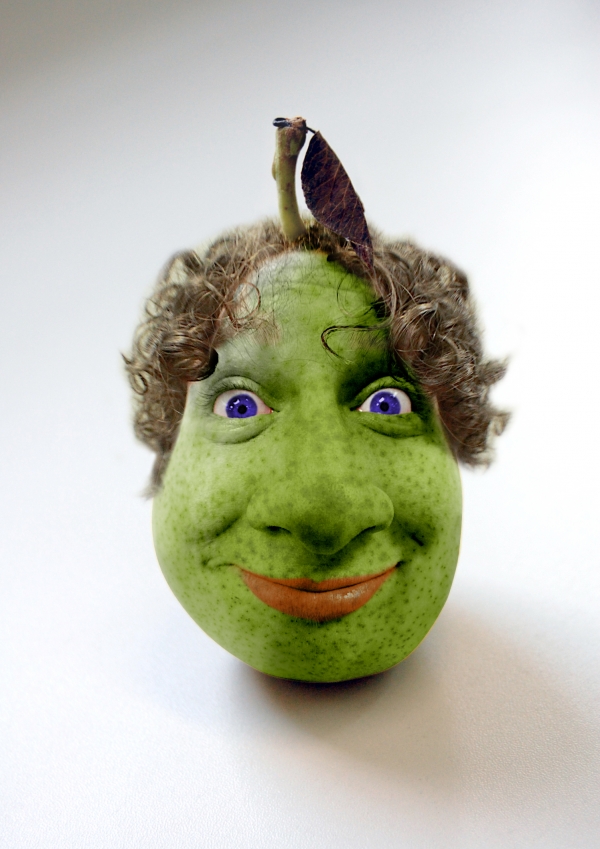
step 4 of 4
Last i readded the hair back in place.
In the final step i added some brown on the pear by duplicating the green pear and turning the colour on it by hue and sat and then add some brown to the green pear with a layer mask.


![[#Beginning of Shooting Data Section] Nikon D2X 2005/11/23 16:06:40.4 RAW (12-bit) Image Size: Large (4288 x 2848) Lens: 60mm F/2.8 D Focal Length: 60mm Exposure Mode: Manual Metering Mode: Multi-Pattern 1/125 sec - F/19 Exposure Comp.: 0 EV Sensitivity: ISO 100 Optimize Image: White Balance: Flash AF Mode: Manual Flash Sync Mode: Not Attached Color Mode: Mode I (Adobe RGB) Tone Comp.: Normal Hue Adjustment: 0° Saturation: Normal Sharpening: None Image Comment: Long Exposure NR: Off High ISO NR: Off [#End of Shooting Data Section]](https://blogger.googleusercontent.com/img/b/R29vZ2xl/AVvXsEi0D0EKN1MVscOked6g2RSezo0sCXIxr2-GJ7-pCFZdlD6kAdfa5_1iHIhGpV5ZeuzBz_NxcQ2ss-Q3Bfy2nxB2iirKWcpbKE7jp2OgU6LLvC0J-rUgVibtacmmbl3Yuj9DTShR_wLJTZO3/s1600-h/apples-sunrise-2%25255B6%25255D.jpg "[#Beginning of Shooting Data Section] Nikon D2X 2005/11/23 16:06:40.4 RAW (12-bit) Image Size: Large (4288 x 2848) Lens: 60mm F/2.8 D Focal Length: 60mm Exposure Mode: Manual Metering Mode: Multi-Pattern 1/125 sec - F/19 Exposure Comp.: 0 EV Sensitivity: ISO 100 Optimize Image: White Balance: Flash AF Mode: Manual Flash Sync Mode: Not Attached Color Mode: Mode I (Adobe RGB) Tone Comp.: Normal Hue Adjustment: 0° Saturation: Normal Sharpening: None Image Comment: Long Exposure NR: Off High ISO NR: Off [#End of Shooting Data Section]")
![[#Beginning of Shooting Data Section] Nikon D2X 2005/11/23 16:06:40.4 RAW (12-bit) Image Size: Large (4288 x 2848) Lens: 60mm F/2.8 D Focal Length: 60mm Exposure Mode: Manual Metering Mode: Multi-Pattern 1/125 sec - F/19 Exposure Comp.: 0 EV Sensitivity: ISO 100 Optimize Image: White Balance: Flash AF Mode: Manual Flash Sync Mode: Not Attached Color Mode: Mode I (Adobe RGB) Tone Comp.: Normal Hue Adjustment: 0° Saturation: Normal Sharpening: None Image Comment: Long Exposure NR: Off High ISO NR: Off [#End of Shooting Data Section]](https://blogger.googleusercontent.com/img/b/R29vZ2xl/AVvXsEi-Hu62KK3QkIRSx7w6B7lsAtwRrfQDHmJdSTF7l3XCEYG5oYCr7TUemLRWR3eItIGy8HgRYkpSoGUkxJnopidAiftntBrClhrNjB-dq0dcbMnYoZ-beqCNO6wRA4NewLAAyC9etZAp7Y8/s1600-h/Sketch%25255B4%25255D.jpg "[#Beginning of Shooting Data Section] Nikon D2X 2005/11/23 16:06:40.4 RAW (12-bit) Image Size: Large (4288 x 2848) Lens: 60mm F/2.8 D Focal Length: 60mm Exposure Mode: Manual Metering Mode: Multi-Pattern 1/125 sec - F/19 Exposure Comp.: 0 EV Sensitivity: ISO 100 Optimize Image: White Balance: Flash AF Mode: Manual Flash Sync Mode: Not Attached Color Mode: Mode I (Adobe RGB) Tone Comp.: Normal Hue Adjustment: 0° Saturation: Normal Sharpening: None Image Comment: Long Exposure NR: Off High ISO NR: Off [#End of Shooting Data Section]")

![[#Beginning of Shooting Data Section] Nikon D2X 2005/11/23 16:06:40.4 RAW (12-bit) Image Size: Large (4288 x 2848) Lens: 60mm F/2.8 D Focal Length: 60mm Exposure Mode: Manual Metering Mode: Multi-Pattern 1/125 sec - F/19 Exposure Comp.: 0 EV Sensitivity: ISO 100 Optimize Image: White Balance: Flash AF Mode: Manual Flash Sync Mode: Not Attached Color Mode: Mode I (Adobe RGB) Tone Comp.: Normal Hue Adjustment: 0° Saturation: Normal Sharpening: None Image Comment: Long Exposure NR: Off High ISO NR: Off [#End of Shooting Data Section]](https://blogger.googleusercontent.com/img/b/R29vZ2xl/AVvXsEgHXDNxCGCGG517hW1wg52oKnU5-C5S74kIB4EMZ9NTdzj_uWIKMqTpyFXTGjrcwyu_axwZr-oM77BOedWSrCpv9MwhNbYGfI-vELV29lstYw08SNlJ8dswLnSteaLoJEPmoGlt1veYVi0/s1600-h/Fill-in2%25255B9%25255D.jpg "[#Beginning of Shooting Data Section] Nikon D2X 2005/11/23 16:06:40.4 RAW (12-bit) Image Size: Large (4288 x 2848) Lens: 60mm F/2.8 D Focal Length: 60mm Exposure Mode: Manual Metering Mode: Multi-Pattern 1/125 sec - F/19 Exposure Comp.: 0 EV Sensitivity: ISO 100 Optimize Image: White Balance: Flash AF Mode: Manual Flash Sync Mode: Not Attached Color Mode: Mode I (Adobe RGB) Tone Comp.: Normal Hue Adjustment: 0° Saturation: Normal Sharpening: None Image Comment: Long Exposure NR: Off High ISO NR: Off [#End of Shooting Data Section]")
![[#Beginning of Shooting Data Section] Nikon D2X 2005/11/23 16:06:40.4 RAW (12-bit) Image Size: Large (4288 x 2848) Lens: 60mm F/2.8 D Focal Length: 60mm Exposure Mode: Manual Metering Mode: Multi-Pattern 1/125 sec - F/19 Exposure Comp.: 0 EV Sensitivity: ISO 100 Optimize Image: White Balance: Flash AF Mode: Manual Flash Sync Mode: Not Attached Color Mode: Mode I (Adobe RGB) Tone Comp.: Normal Hue Adjustment: 0° Saturation: Normal Sharpening: None Image Comment: Long Exposure NR: Off High ISO NR: Off [#End of Shooting Data Section]](https://blogger.googleusercontent.com/img/b/R29vZ2xl/AVvXsEgetxUvoSUHAPsn_CHa4mFC7uD_jcqvUZNIiVl0FEoJdLjUYikyJZhdHIN8XTOI1hwmozOCrqroCC4N68_19YV5VucUFruTHNZyn39rjX2WUD-iOORG06Yw3huB0K2eakGNC1BnI5a65e4/s1600-h/Fill-in%25255B9%25255D.jpg "[#Beginning of Shooting Data Section] Nikon D2X 2005/11/23 16:06:40.4 RAW (12-bit) Image Size: Large (4288 x 2848) Lens: 60mm F/2.8 D Focal Length: 60mm Exposure Mode: Manual Metering Mode: Multi-Pattern 1/125 sec - F/19 Exposure Comp.: 0 EV Sensitivity: ISO 100 Optimize Image: White Balance: Flash AF Mode: Manual Flash Sync Mode: Not Attached Color Mode: Mode I (Adobe RGB) Tone Comp.: Normal Hue Adjustment: 0° Saturation: Normal Sharpening: None Image Comment: Long Exposure NR: Off High ISO NR: Off [#End of Shooting Data Section]")